


Access Point Placement for Homes & Small Offices: 15-20% Overlap Rule
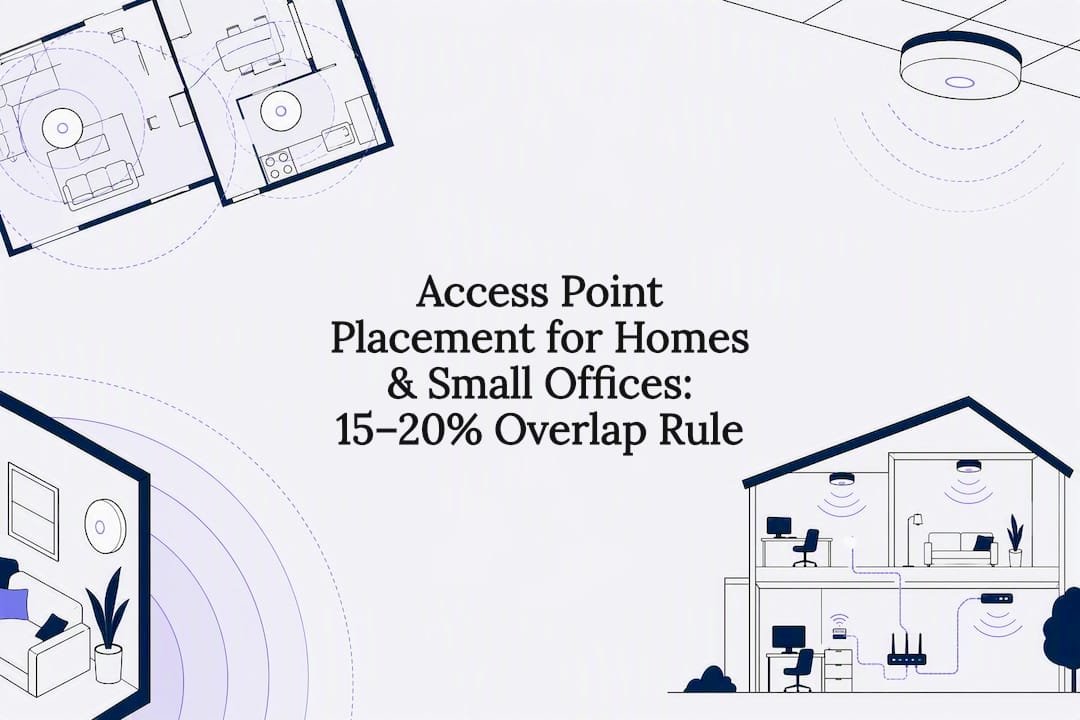
Mount your access point on the ceiling, centred over the space where people actually use their devices, not tucked beside the router or ISP box. Run a wired Cat6 connection with Power over Ethernet, space multiple APs so their coverage overlaps by roughly 15 to 20%, and aim for a signal strength no weaker than -70 dBm anywhere you need reliable Wi-Fi. If ceiling mounting genuinely isn't possible, mounting high on a wall is typically the next best option.
Key takeaways
- Proper placement starts with ceiling mounting centered over areas where devices are used, with wired PoE connections and coverage overlap of 15 to 20 percent.
- Using higher frequency bands like 5 GHz and 6 GHz requires clearer line-of-sight and optimal placement, as they degrade quickly through structural obstacles.
- Coverage efficiency is maximized when APs are spaced roughly 1,200 to 1,800 square feet in homes, with tighter spacing needed for dense materials like brick or concrete.
- Walktests should confirm signal strength no weaker than -70 dBm with proper channel and power adjustments before considering additional APs.
- Outdoor APs demand weatherproofing, careful height and orientation, and external cabling with proper sealing to maintain reliable coverage.
Table of Contents
- Why access point placement affects coverage and performance
- Core placement principles and planning rules
- Mounting height and orientation: ceilings, walls and in-wall options
- Spacing and density: how many APs and how far apart
- Scenario how-to: checklists for home, multi-storey and small office
- Wiring, PoE and installation practicalities
- Testing and validation: walktests, RSSI targets and tuning
- Common placement mistakes and quick fixes
- How PC Scientist runs a site survey and verifies placement
- Outdoor access point placement considerations
- Integration with existing network infrastructure and constraints
- Access point placement, interference and channel planning
- Adjusting placement for device types and usage patterns
- When to DIY and when to hire a specialist
- Get your placement verified by PC Scientist
- Sources
- FAQ
Why access point placement affects coverage and performance
Radio signals don't travel through your house the way light does. They bounce off walls, get absorbed by insulation and brick, and lose strength every time they pass through something solid. This is why two homes with identical routers can have completely different Wi-Fi experiences. One placement gives you a clean line of sight to every room; another forces the signal through three walls and a fridge.
Frequency choice compounds the problem. The ITU's indoor propagation guidance recommends siting base stations as high as possible near the ceiling specifically to maximise line-of-sight paths and cut down on these impairments. That single positioning decision does more for real-world performance than almost any setting you'll find in a router's admin panel.
Band selection matters just as much:
- 2.4 GHz penetrates walls and floors well but carries far less data, so it suits reach over speed.
- 5 GHz and 6 GHz deliver much higher throughput but degrade quickly once they hit structural attenuation, meaning they need a cleaner path to work at their best.
- An empirical assessment of Wi-Fi 7 performance confirms this trade-off holds even with the newest hardware. Higher bands are fast but fragile indoors.
A high, central mount gives every frequency band the best possible chance to reach the rooms you actually care about.
Core placement principles and planning rules
Good placement comes down to a handful of rules you can apply in almost any home or office, regardless of how the building is laid out.
- Centre the AP over where people use devices, not over the equipment rack or the spot where the NBN line enters the house. A perfectly positioned AP two metres from where everyone actually sits with a laptop is still a poor result.
- Overlap adjacent coverage cells by 15 to 20%. This lets devices roam between APs without a dead zone, but avoid overlapping so much that two APs sit almost on top of each other through a dense wall.
- Keep APs clear of cabinets, HVAC ducts, and large metal fixtures. Metal shelving, ducted air conditioning, and steel beams all distort or block signal in ways that are hard to predict from a floor plan alone.
- Wire every AP where you possibly can. A wired backhaul removes the guesswork of mesh hopping and keeps your access points from competing with client devices for airtime.
Pro Tip: If an AP has to sit near a steel beam or ducting, try shifting it sideways by even 200 to 300 millimetres before reaching for a higher power setting. Small positional changes shift the multipath pattern far more effectively than turning up the transmit power, and they don't create extra interference for neighbouring cells.
Mounting height and orientation: ceilings, walls and in-wall options
Ceiling mounting wins in almost every residential and small office scenario, and the reasoning is straightforward: it's the position least likely to be blocked by furniture, people, or clutter, and it gives the signal the cleanest possible path outward in all directions.
- For standard ceilings, mount the AP flush or just below the ceiling line, centred in the room or hallway it's meant to serve.
- Wall mounting is a reasonable fallback when ceiling cabling isn't practical (heritage homes, strata restrictions, or exposed slab ceilings). Mount as high as the wall allows, ideally above 2 metres, and expect a slightly more directional, less even coverage pattern than a ceiling unit gives you.
- In-wall units suit retrofit situations where you're replacing an existing wall plate and don't want visible cabling changes, but they generally cover less floor area than a ceiling-mounted equivalent.
- Vaulted or very high ceilings need a compromise. Mounting an AP at 4 or 5 metres up looks tidy but throws signal down at an angle that misses furniture-height devices. In these spaces, a mid-height wall mount or a pole-mounted unit closer to human height often performs better than a ceiling install.
Spacing and density: how many APs and how far apart
Most homes don't need as many access points as people assume, and over-deploying them creates its own problems.
- Start with one AP per roughly 1,200 to 1,800 square feet for typical timber-frame or plasterboard construction, a figure backed by installer sizing heuristics from Data Wire Solutions.
- Tighten that spacing in homes with concrete floors, brick internal walls, or double-brick construction, since these materials absorb far more signal than a standard stud wall.
- For open floor plans, a simple grid or honeycomb pattern spreads coverage evenly. For long, narrow layouts like terrace houses, a corridor-centred line of APs down the hallway usually beats a grid.
- Reduce contention between multiple APs by staggering non-overlapping channels and lowering transmit power slightly on units that sit close together, then walk-test the result before locking it in.
Three APs in a triangular or honeycomb layout, each covering a third of the floor with generous overlap at the edges, is the standard installer starting point for anything larger than a small apartment.
Scenario how-to: checklists for home, multi-storey and small office
Different building types need different starting assumptions, even though the underlying rules stay the same.
- Single-floor, open-plan home: mount one AP centrally on the ceiling, sized to one unit per 1,200 to 1,800 square feet. If the home stretches beyond that footprint or has a separate wing, add a second AP at the far end rather than boosting power on the first.
- Multi-storey home: budget for one AP per floor as a baseline. Place each unit in a hallway or stairwell landing rather than inside a bedroom, since circulation spaces give more even coverage to the rooms branching off them.
- Small office: map out meeting room usage before finalising positions. A conference room with six people on video calls needs its own dedicated AP rather than relying on spillover from the open-plan area, and every AP should have planned wired backhaul from the outset rather than being retrofitted later.
The common thread across all three is that circulation and shared spaces make better AP homes than the rooms where people spend the least concentrated time.
Wiring, PoE and installation practicalities
The mounting decision only works if the cabling behind it is done properly.
- Run a dedicated home-run Cat6 cable from your patch panel or switch straight to each AP location, avoiding daisy-chained runs that limit future flexibility.
- Leave a service loop of spare cable at the AP end so you can shift the mounting point slightly during install without redoing the whole run, an approach detailed in CrimpShop's cabling guide.
- A PoE switch suits installs with several APs and other PoE devices like cameras, while a single PoE injector is fine for a one or two AP retrofit where running a new switch isn't worthwhile.
- Respect cable bend radius when routing through joists or wall cavities, and confirm attic access is safe before anyone climbs up to terminate a run.
Testing and validation: walktests, RSSI targets and tuning
Placement isn't finished until you've confirmed it works from where people actually stand, sit, and work.
- Walk the space with a Wi-Fi analyser app on a phone or laptop, logging signal strength room by room, including bedrooms, home offices, and outdoor patios if they matter to you.
- The Pakedge wireless design guide recommends marking the point where signal drops to -70 dBm as the practical cell edge, and using that boundary to decide where the next AP's coverage should pick up.
Target numbers: keep RSSI above roughly -70 dBm anywhere you need usable Wi-Fi, and aim for a signal-to-noise ratio of at least 20 dB in rooms where people work, stream, or game.
If a room falls short, don't jump straight to buying another AP. Try adjusting transmit power on the nearest unit, switching to a cleaner channel, or moving the AP a short distance first. Only add or relocate a unit once you've confirmed the shortfall isn't a channel or power problem you can tune out.
Common placement mistakes and quick fixes
A handful of errors show up in almost every troubled Wi-Fi setup.
- AP sitting on a desk or inside a cabinet: move it to the highest clear point in the room, ideally ceiling height, immediately.
- Too many APs with no channel or power plan: stagger channels manually and drop transmit power on units that overlap, rather than letting them all fight at full strength.
- Ignoring dense materials like brick or concrete: check wall composition before finalising a plan, and expect to tighten AP spacing in these areas rather than relying on the same rule you'd use for stud walls.
How PC Scientist runs a site survey and verifies placement
A Business Network & Wi-Fi Assessment measures actual coverage, interference sources, and backhaul readiness across your space, not just a theoretical floor plan. PC Scientist turns those readings into a placement plan, then confirms it with a post-install walktest so you know the numbers hold up under real use, not just on paper.
Outdoor access point placement considerations
Outdoor coverage brings its own set of rules on top of everything already covered.
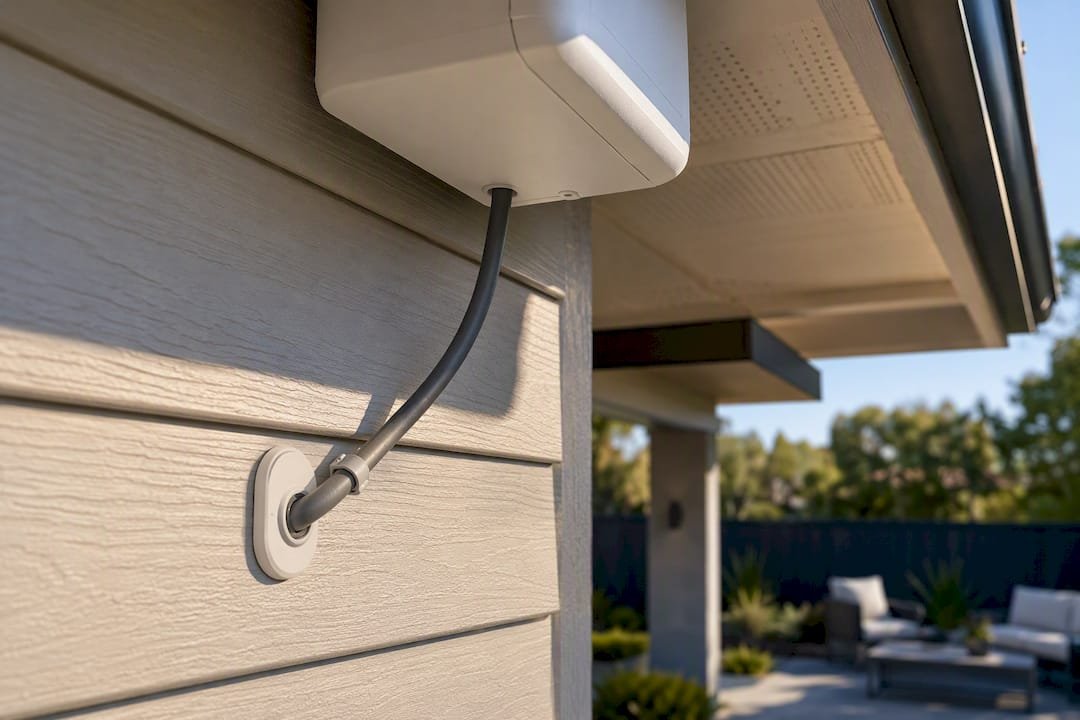
Weatherproofing comes first. Any AP mounted outdoors, under an eave, on a pergola, or against an external wall, needs an IP-rated enclosure or purpose-built outdoor unit, since ordinary indoor hardware fails quickly against rain and humidity even under partial cover.
Distance and obstruction matter more outside than in. Glass sliding doors, brick veneer, and garden foliage all cut into signal strength, so an AP that comfortably covers an indoor living area often can't push a usable signal much further than the immediate patio beyond it. Treat outdoor zones as their own coverage cell rather than assuming indoor spillover will reach the yard.
Mounting height still favours elevation, but orientation needs more thought outdoors. A unit under an eave should angle slightly downward toward the zone you want covered, rather than straight ahead, to avoid wasting signal into open sky.
Backhaul is the part people forget. An outdoor AP still needs power and a data connection, and running a weatherproof, UV-rated cable through an external wall is a very different job to an indoor Cat6 run. This is one of the more common points where a DIY install stalls, since the cable path often needs proper conduit and sealing to avoid water ingress later.
Interference sources change outdoors too. Neighbouring Wi-Fi networks, security cameras, and even some garden lighting controllers can share the same 2.4 GHz spectrum, so a quick scan of nearby networks before finalising channel selection is worth the extra ten minutes.
Integration with existing network infrastructure and constraints
Access points don't operate in isolation. Every unit needs to sit sensibly within the switch, router, and cabling setup already in the building, and ignoring that context is one of the fastest ways to end up with a placement plan that looks good on a diagram but fails in practice.
Start with your switch capacity. Adding three or four PoE access points to a network that's already running cameras, printers, and a NAS on a small unmanaged switch can exceed available PoE budget before you've even considered signal coverage. Check the switch's total PoE wattage against everything it needs to power, not just the AP count.
VLAN and SSID structure also constrains placement indirectly. Businesses running separate guest and staff networks, or homes with an IoT-only SSID, need every AP broadcasting the same set of networks consistently. An AP added later that's missing a VLAN tag or SSID configuration creates confusing dead spots that look like a placement problem but are actually a configuration gap.
Existing cabling is often the real limiter. Many homes and older offices simply don't have spare Cat6 runs to the ideal ceiling points, which is exactly why the wiring section above matters so much before finalising a mounting plan. Academic modelling work using Cost-231 Multi-Wall propagation methods can predict good AP locations mathematically, but those predictions are only as good as the wall-attenuation assumptions fed into them, which is why a physical site survey still catches things a model misses.
Router and modem placement rarely changes, since that's usually fixed by where the NBN connection enters the building. The practical fix is almost always a dedicated AP fed by a wired backhaul from that point, rather than trying to relocate the ISP equipment itself.
Access point placement, interference and channel planning
Placement and channel planning are two sides of the same problem. Get the physical position wrong, and no amount of channel tuning fixes it. Get the position right but ignore channels, and you'll still see the same stuttering, dropped-call symptoms.
The 2.4 GHz band only has three non-overlapping channels in most regions, which means any home or office with more than two or three APs on that band will see some overlap no matter how carefully you place them. This is one of the strongest arguments for centring APs correctly first, since good geometry reduces how much that overlap actually matters.
5 GHz and 6 GHz offer far more channels, which gives you room to stagger APs cleanly, but their shorter range means poor placement shows up faster as a coverage gap rather than just interference. A multi-band Wi-Fi 7 study found these higher bands lose usable throughput quickly once structural attenuation kicks in, reinforcing that placement decisions matter more, not less, as you lean on faster bands.
Neighbouring networks add a layer you can't fully control. In townhouses, apartments, and dense suburban blocks, your neighbour's router is competing for the same 2.4 GHz channels as yours. A quick channel scan during your walktest tells you which channels are already crowded nearby, so you can pick the cleanest option rather than defaulting to whatever the router shipped with.
The practical order of operations is always placement first, channels second. Fixing a bad position with clever channel selection is a temporary patch; getting the position right in the first place is the actual solution.
Adjusting placement for device types and usage patterns
Not every device needs the same thing from your Wi-Fi, and smart placement accounts for that rather than treating every room as an equal priority.
High-bandwidth, stationary devices, like a smart TV streaming 4K content or a desktop PC used for video calls, benefit most from being close to an AP on a clean 5 GHz or 6 GHz connection. If a media room or home office is your household's heaviest user, it deserves priority when you're deciding where the nearest AP sits, even if that means slightly thinner coverage in a spare room that barely gets used.
Mobile and roaming devices, phones, tablets, laptops carried between rooms, need overlapping coverage more than raw speed in any one spot. This is where the 15 to 20% overlap rule earns its keep since it lets a phone hand off between APs without a noticeable drop as someone walks from the kitchen to the living room.
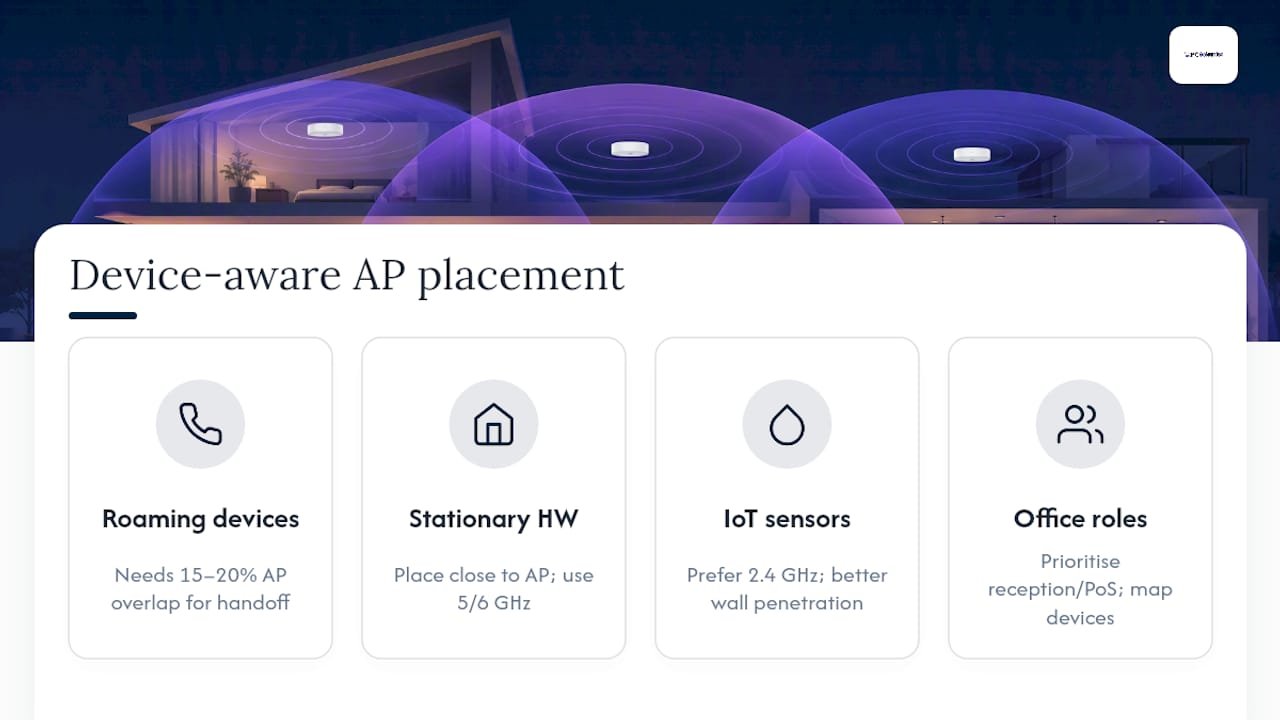
Battery-powered smart home devices and IoT sensors are usually happiest on 2.4 GHz, given its better wall penetration, so don't judge your AP placement solely by how a fast laptop performs. A door sensor in a back room might need a completely different coverage margin than the media room does.
Small offices should think about this by role rather than room. A reception desk running a phone system and a point-of-sale terminal needs rock-solid, low-latency coverage, while a storeroom with an occasional barcode scanner can tolerate a weaker signal without anyone noticing. Map your device list before finalising placement, not just your floor plan.
When to DIY and when to hire a specialist
A single-floor home with two or three rooms is a fair DIY project. Multi-storey houses, concrete construction, or an office with several meeting rooms usually justify a proper site survey. A small Wi-Fi assessment is typically recommended around exactly that threshold.
- PC Scientist
Get your placement verified by PC Scientist
Reading through the guide above and mapping it against your own floor plan is the right first step, but confirming it with real numbers is what actually locks in reliable coverage. A Business Network & Wi-Fi Assessment can measure existing coverage, check for interference sources, and review whether cabling supports a wired backhaul to every AP you need.

Instead of guessing at mounting points and hoping a walktest confirms them later, measurements can be turned into a placement plan first, then verified once everything's installed. That means you're not paying for trial and error, you're paying for a result that's already been checked. If you'd rather have someone map the coverage, wiring, and mounting points properly the first time, consider booking a Business IT Support consultation for a plan based on your actual building, not a generic floor plan.
Sources
The ITU-R P.1238-11 propagation standard and installer sizing guides above underpin most of this article's numeric guidance. For further reading on how obstacles affect signal, kinodesk's networking resources offer useful background on indoor attenuation.
- ITU-R P.1238-11: Propagation data and prediction methods for the planning of indoor radiocommunication systems
- Empirical assessment of Wi‑Fi 7 performance across indoor impairments
- How many Wi‑Fi access points do you need? A 2026 sizing guide for homes and small offices | Data Wire Solutions
- WiFi Access Point Placement and Cabling Guide | CrimpShop
- Pakedge wireless design guide
Recommended
Frequently Asked Questions
Straight answers about Access Point Placement for Homes & Small Offices: 15-20% Overlap Rule - without jargon or pressure. Call 0493 563 381 for advice, or get help below.
Want the quickest answer? 0493 563 381 for free advice.
Mount it on the ceiling, centred over the area where people actually use their devices, with a wired connection back to your switch. If ceiling mounting isn't possible, high on a wall is the next best option.
Ceiling mounting almost always wins because it gives the clearest line of sight and the most even coverage pattern in every direction. Wall mounting is a solid fallback for retrofits, but expect a more directional, slightly less even result.
Budget for one AP per floor, positioned in a hallway or stairwell landing rather than inside a bedroom. Circulation spaces spread coverage more evenly to the rooms branching off them than a single room ever can.
For a typical home, that usually works out to one AP per 1,200 to 1,800 square feet, tightened up in concrete or brick-heavy construction.
Wi-Fi help across NSW
Still stuck with dead spots after moving the AP?
If the steps above did not get Wi-Fi behaving, that is okay. Get help in your area and we will take it from here.
Start here
Get Wi-Fi help
Optional Need a Sydney city or region?
Choose a side of Sydney
These are Sydney cities and regions, such as the Northern Beaches or Inner West. First tap a side of Sydney. Then open the city or region that covers you.
C Sydney City / Inner 3 areas
N Northern Sydney 6 areas
NW North-West / Central Sydney 3 areas
W Western Sydney 1 area
SW South-West Sydney 3 areas
S Southern Sydney 2 areas
Optional Find your suburb
Type a suburb from our listed coverage. This opens the matching city or region page for this topic. Listed suburb pages are general technology services, not this specialist page.
If your suburb is not listed, use the city or region list above, or call 0493 563 381.
Disclaimer
The information in this article is provided for general educational and informational purposes only. While PC Scientist strives to keep all content accurate and up to date, technology issues can vary depending on your device, software, network configuration, and individual circumstances. Always back up important data before attempting repairs or system changes. If you are unsure or the issue cannot be resolved safely, contact PC Scientist today for professional onsite or remote IT support. PC Scientist is not liable for any loss of data, damage, or other issues resulting from the use of the information provided in this article.